A Valentine's Day Art Project To Do At Home
- Wednesday, 10 February 2021 13:51
- Last Updated: Wednesday, 10 February 2021 14:15
- Published: Wednesday, 10 February 2021 13:51
- Joanne Wallenstein
- Hits: 2409
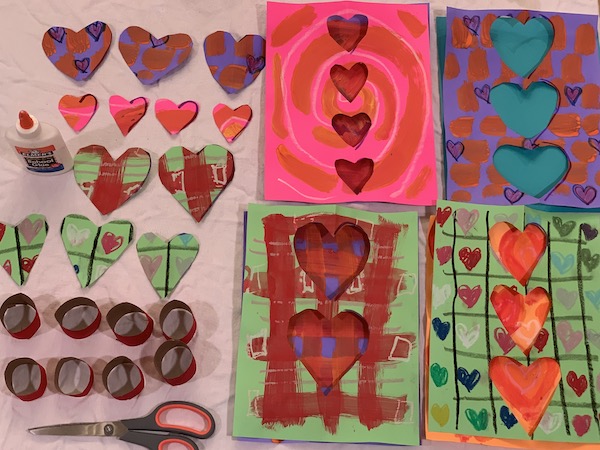 Scarsdale artist and art teacher Marnie Gelfman has designed a new monthly program to bring art home to your children. According to Gelfman, “So much has shifted in our daily lives and the pandemic has unfortunately severely impacted our children and schools. Sadly, many enrichment programs have been cut, especially in the Arts. Children are not reaping the important benefits from visually expressing themselves, which cultivates independent thinkers, helps them gain confidence, take risks and flex creative muscles. The arts also help to reduce anxiety and stress, which is so needed right now.”
She is collaborating wither son to create, "Exploring Colors", a new monthly subscription art box for children (K-5th grade) paired with weekly online lessons on youtube. Each month a different curated box of art supplies is delivered and children are exposed to different ways to use the materials. This is not a cookie cutter one way approach to create. Instead, children will start to build an art library and create, using online videos that they can watch at their convenience. Children will be given the freedom to create their own way.
Check it out at www.exploringcolors.com.
In the meantime, Gelfman has shared instructions for a Valentine’s Day art project that can be done at home. Follow her instructions below and send photos of the completed projects to scarsdalecomments@gmail.com and we’ll share your creations with our community. Enjoy!
 Children’s Art Project: Create Festive Napkin Rings And Cards With Materials You Have At Home For Valentine’s Day
Materials (most items you should have at home):
- Paper towel cardboard insert (or 2 toilet paper cardboard inserts)
- Tempera paints (preferably red, white, orange, yellow but any colors you have from painting at the Window Painting contest will work.)
- Large paint brush
- A few q-tips (to be used like a small paint brush- no prob if you don't have them)
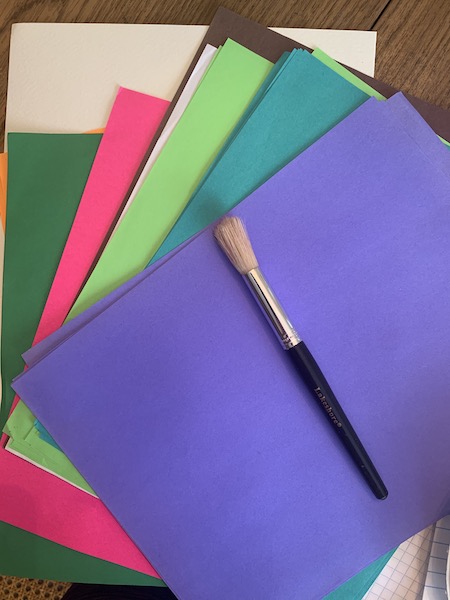
- Colored Construction Paper (an assortment of colors- maybe 8 sheets)
 - White printer paper (4 sheets)
- Scissors
- Elmer’s glue
- A cup or jar of water (for painting) I often use empty tomato sauce jars.
- A few paper towels
- One or two paper plates to use as a paint palette to mix colors
- Old newspaper to put on table or floor to act as a drop cloth.
- Optional: cray-pas (oil crayons) or regular crayons or colored markers.
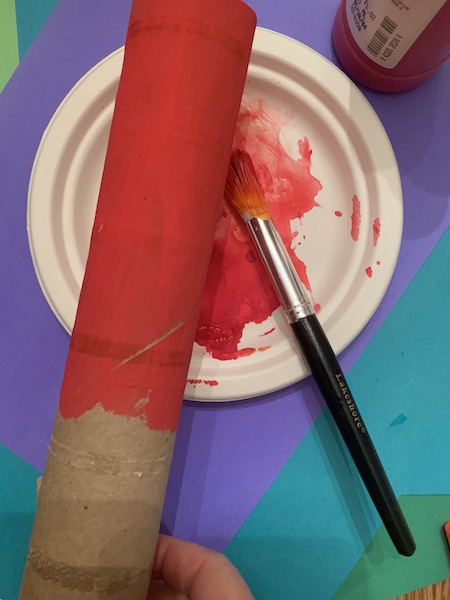
First step is to paint the paper towel cardboard insert (or the 2 toilet paper inserts. Place 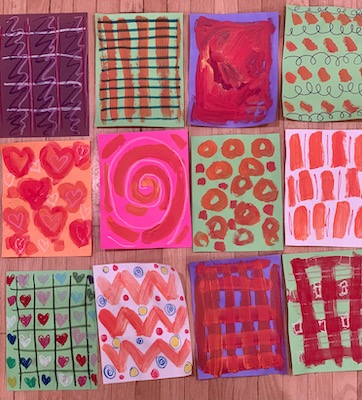 newspaper on work surface to keep it clean. Pour a bit of red paint onto plate. Maybe the size of 2 quarters. Fill cup or jar with water for paintbrush and have a piece of paper towel handy. Put fingers into center of paper towel insert and using a large paint brush paint the outside until the entire tube is covered. (You may need to dip the brush into the water if paint is too thick.) Set it on newspaper to dry. This will be cut once it is dry to become the napkin rings.
Take most of the colored construction paper and using different colored paint, decorate each piece with different strokes of color. You may want to paint lines, circles, plaids, dashes, hearts, any design you can think of from your imagination! You can also use cray-pas, crayon or markers on some as well. Decorate with lots of patterns and colors! Remember to clean your paintbrush in water when changing color paint. You can use the paper plates as a palette to add new colors. Have fun! Pretend you are designing wrapping paper. De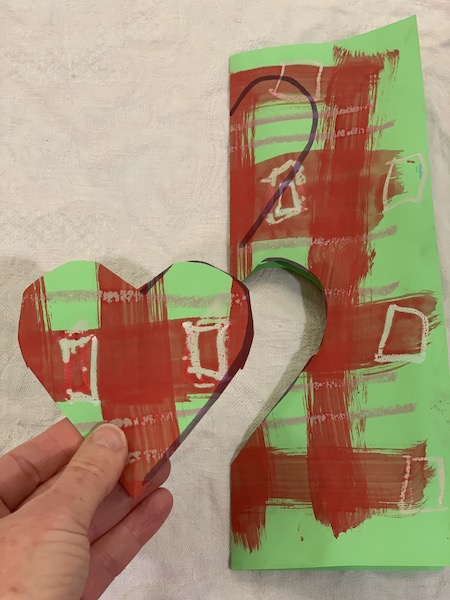 corate a few of the white printer paper as well. You can also use the q-tips to dip into paint and create dots or small designs like hearts. Only decorate one side of the paper. Place everything on newspaper to dry. Leave a few pieces of colored paper and white paper blank as well.
Once the paper towel insert and assorted painted paper is dry (it may take about an hour), cut the paper towel roll into 1 1/2” pieces to make individual napkin ring holders. Set aside.
Fold one of the painted patterned color paper in half lengthwise (so paper is skinny). Draw half a heart on the fold. Most likely 2 or 3 hearts can be drawn down the fold. Using the Scissors cut out the half hearts on the fold. It may be easiest to draw the first heart, cut it out and then use the folded cut out heart as a template to draw the next (so it the same size) and then cut out. Cut out hearts on the fold with half the paper (decorated and undecorated.)
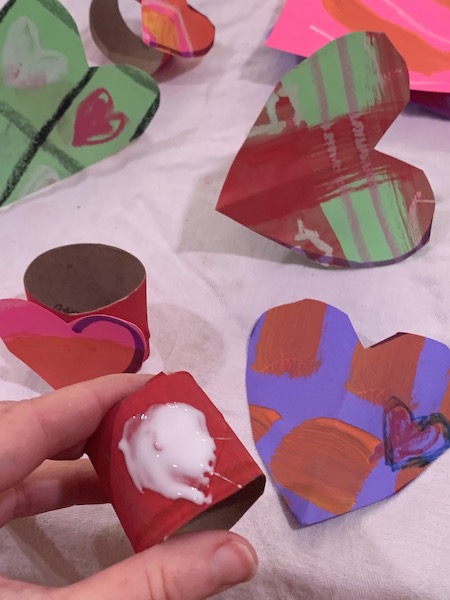
Pick the cutout hearts and using the Elmer’s glue attach a large dot to each of the painted 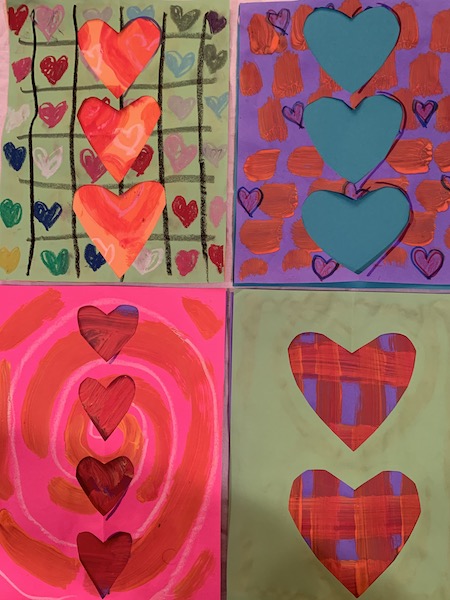 napkins ring holder. Place the heart on the glue and set aside to dry (these will take about an hour to dry.)
Play around with different combinations of the paper in which you cut out hearts placed on top of the paper you did not cut. The heart windows will look different depending on which combinations you use. See which combinations you like the best. Some may look best against solid paper while others might be fun against a different patterns. Once you settle on the best combination, turn the cut out paper over and put glue on the perimeter and around the heart windows and then carefully turn over and glue onto the second piece of solid paper. Do this with all the papers until every cut paper is attached to another background paper. Let dry for about an hour.)
 Once the papers are dry you can use markers to write valentines cards on these! You can write and draw on the front or back. You can also hang on the wall or windows. (Ask your parents first!)
Once the napkin rings are dry, place napkins in them and put on plates. I like to make my table really colorful! Have fun with this and play with different colored plates and napkins through the rings.
Your kitchen or dining room will be festive and filled with love for Valentine’s Day!! Enjoy!
After graduating from Cornell University with a BFA, Marnie Gelfman taught art to children for almost 20 years. She recently received her MFA from the Pennsylvania Academy of the Fine Arts. Marnie sits on various committees at the MoMA, Whitney, ICP and Johnson Museums in New York. She is very excited to combine her love of art with children to bring Explorin g Colors to life with her son, Max!
Find more art projects at www.exploringcolors.com.


